Table of Contents

NASA Solar System Ambassador,
Astronomical League Master of Outreach,
Cruise ship speaker on Astronomy & space science,
Amateur astronomer and photographer for 50 years
My Journey in Astrophotography
For decades I was an avid amateur astronomer and ran public outreach star parties to share the night sky with the public. After Covid-19 hit, and it was deemed unsafe to gather together or share a view through an eyepiece, I was looking for an alternative that would allow me to safely continue astronomy outreach.
In the spring of 2020, I discovered Electronically Assisted Astronomy, where you attach a camera to your telescope and it sends a real time image to PC and then to an attached monitor. This allowed me to show beautiful color images of galaxies and nebulas while guests sat several meters away and were safely separated from each other.

One of the unintended consequences of doing EAA was I discovered I could do a ‘save as’ with any image on my screen, and found myself doing basic astrophotography. From there, I learned more about image acquisition and how to post process your data to get improved results.
What do you want?
One of the first questions to consider when you look at entering astrophotography is what do you want to photograph?
Your preferred target, location, and budget will all affect how you consider entering the hobby.
For night landscapes, the Moon, and basic wide angle Milky Way photos, a DSLR camera on a stable tripod or even a smartphone can provide reasonable results. There are lots of good YouTube tutorials on this approach.
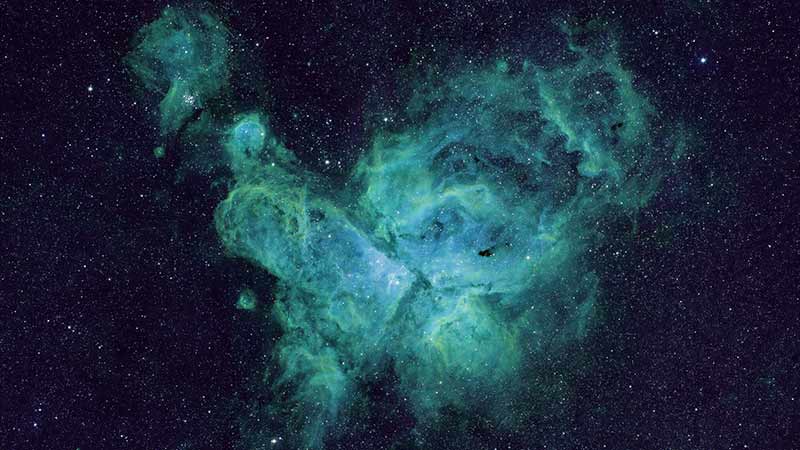
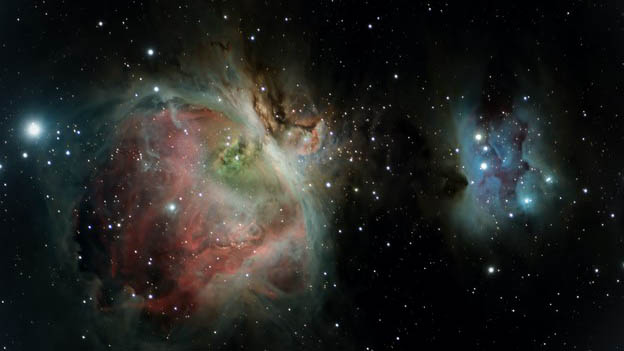
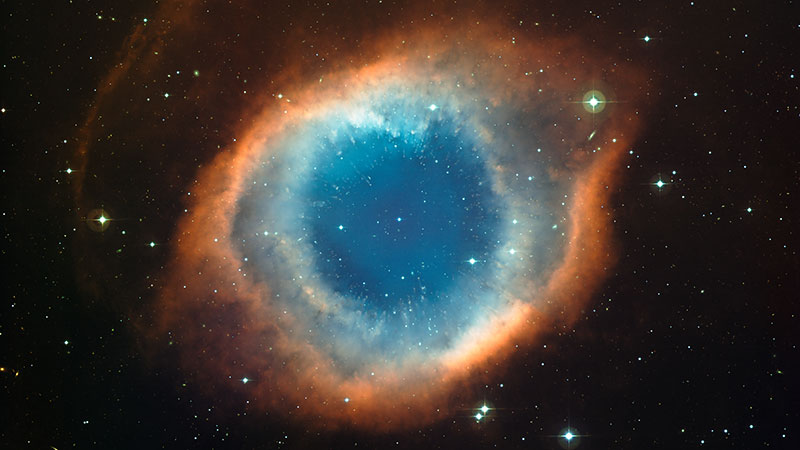
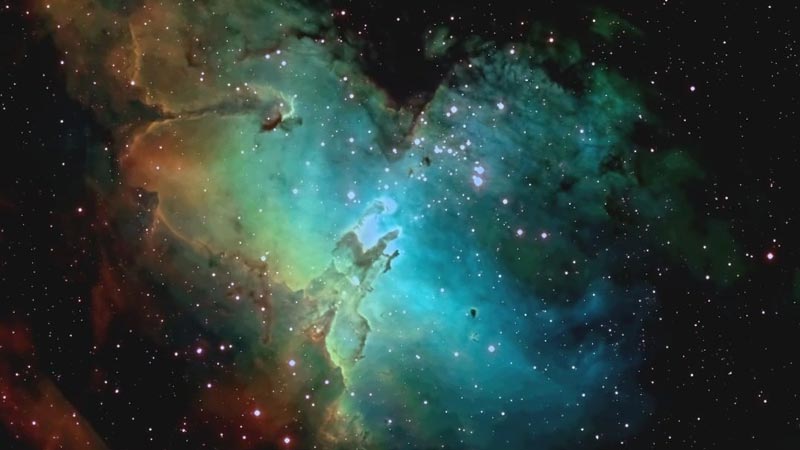
If you want to photograph “deep space” objects like galaxies, star clusters and nebula, then you will need to add a telescope, and a mount that tracks to keep your object centered while the Earth rotates.
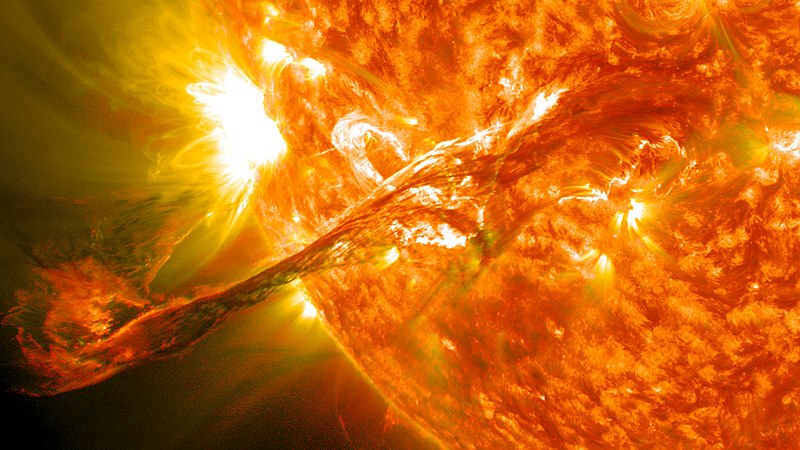
To see solar flares and surface details on the Sun, you’ll need a specialized hydrogen alpha telescope. These are expensive so probably not a good place to start!

And unlike other types of photography, in astrophotography (AP) you are rarely ‘done’ after you shut off your camera. Post processing is a big topic and there are lots of different types of software you can use to help stretch your image, reduce light pollution, sharpen features, improve color and contrast, and produce a satisfying result. I’ll discuss this in more detail in a future article.

A major consideration is where you plan to observe. If you are living out in the country and you are fortunate enough to have dark skies, that will help a great deal in getting good results. If you are in a city, then it will be very difficult to spot fainter objects like galaxies, even if you have a telescope.
Light pollution is measured using the Bortle scale. The darkest skies on Earth are Bortle 1. In a Bortle 1 location, the Sagittarius and Scorpius constellations will cast shadows.

At the other extreme, a Bortle 9 sky would be found in a place like Manhattan, where only the Moon and the very brightest stars are visible to the naked eye.
So if your goal is to photograph faint objects and you live in or near a big city, you may need to bring your equipment to a darker area to get good results. You can somewhat compensate with filters that help mask light pollution, or longer exposures, but nothing beats a dark site.
Progress in Astrophotography
Your journey in AP might have the following progression, starting relatively inexpensively, then adding cost and complexity as you get more serious and ambitious.
- Smart phone AP: can produce dramatic photos of the Moon rising or setting, and basic Milky Way portraits if your device has a ‘night’ mode
- DSLR on stationary tripod: Can produce beautiful Milky way, time lapse, moon phase, and landscape photos
- DSLR on tracking mount: This allows you to keep your shutter open for a long time to gather more light, and produce great Milky way and wide field deep sky images
- DSLR and Telescope on tracking mount: Adding a telescope tremendously boosts the number and type of objects you can photograph. You can get beautiful shots of planets, the Moon, galaxies, star clusters, and nebulae
- Dedicated OSC camera with Telescope: OSC is an acronym for “One Shot Color” camera. There are now fantastic dedicated astronomy cameras that go way beyond the limits of a DSLR and are much easier to use. Many have far higher resolution than your DSLR and have built-in coolers to reduce thermal noise.
- Multiple telescopes/cameras for special situations: Every telescope has limitations (field of view, aperture, focal ratio, image quality, portability, etc). Once you really get into this hobby you may end up collecting multiple telescopes optimized for different types of targets
- Narrowband imaging: An OSC camera captures red/green/blue at once. With narrowband imaging you would use a mono camera, then use a Red, green, then blue filter and take 3 times the number of exposures on the same target. Ironically mono cameras are more expensive than equivalent OSC cameras. You would also use this arrangement to image in narrowband wavelengths (Ha, OIII, SII).

In future articles we’ll take a deeper dive into AP using a telescope and discuss topics like choosing a mount, filters, guiding, calibration frames, post processing options and more.
It can be a lifelong journey of learning!